

Your header is the bar at the top of every page of your event website. It holds your logo (or your event name) and the menu your guests use to get around. You set it all up on one page, and a live preview shows each change before your guests see it.
Step 1: Open Header & Menu
From your dashboard, click Layout in the side menu, then click Header & Menu.
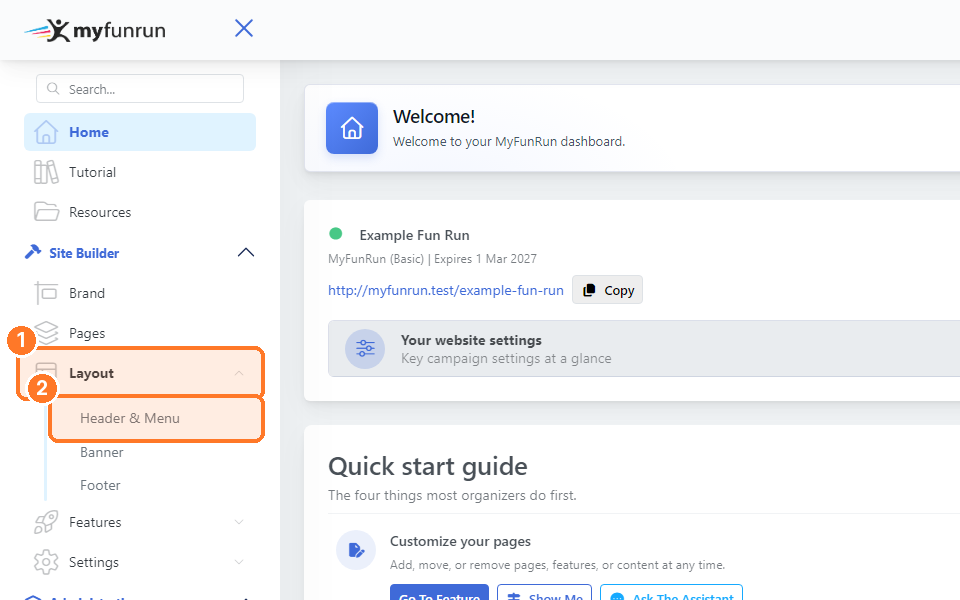
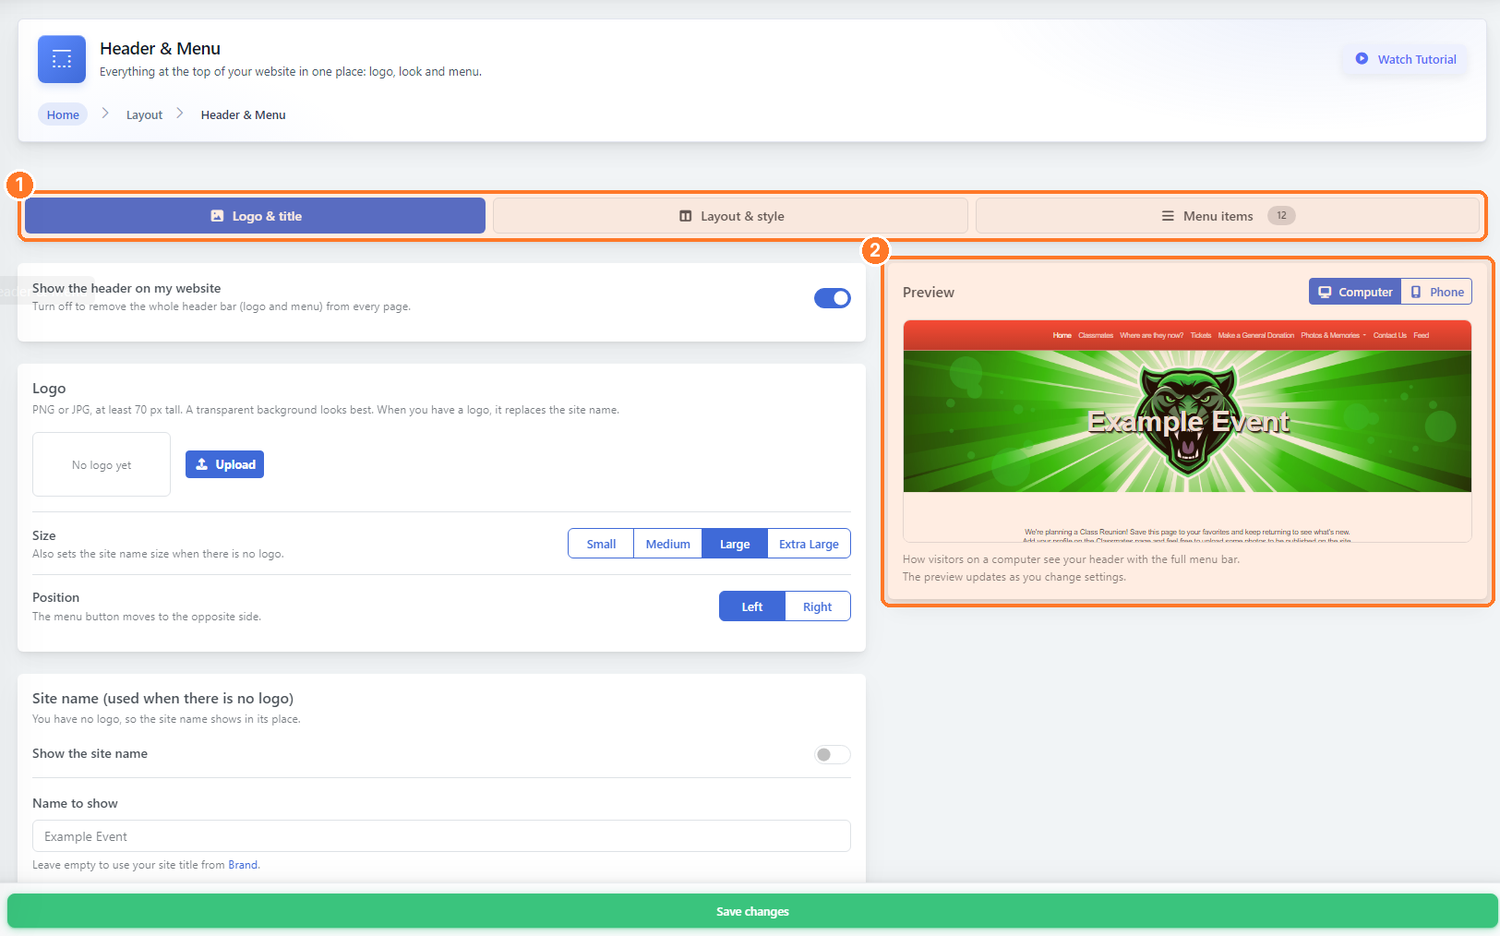
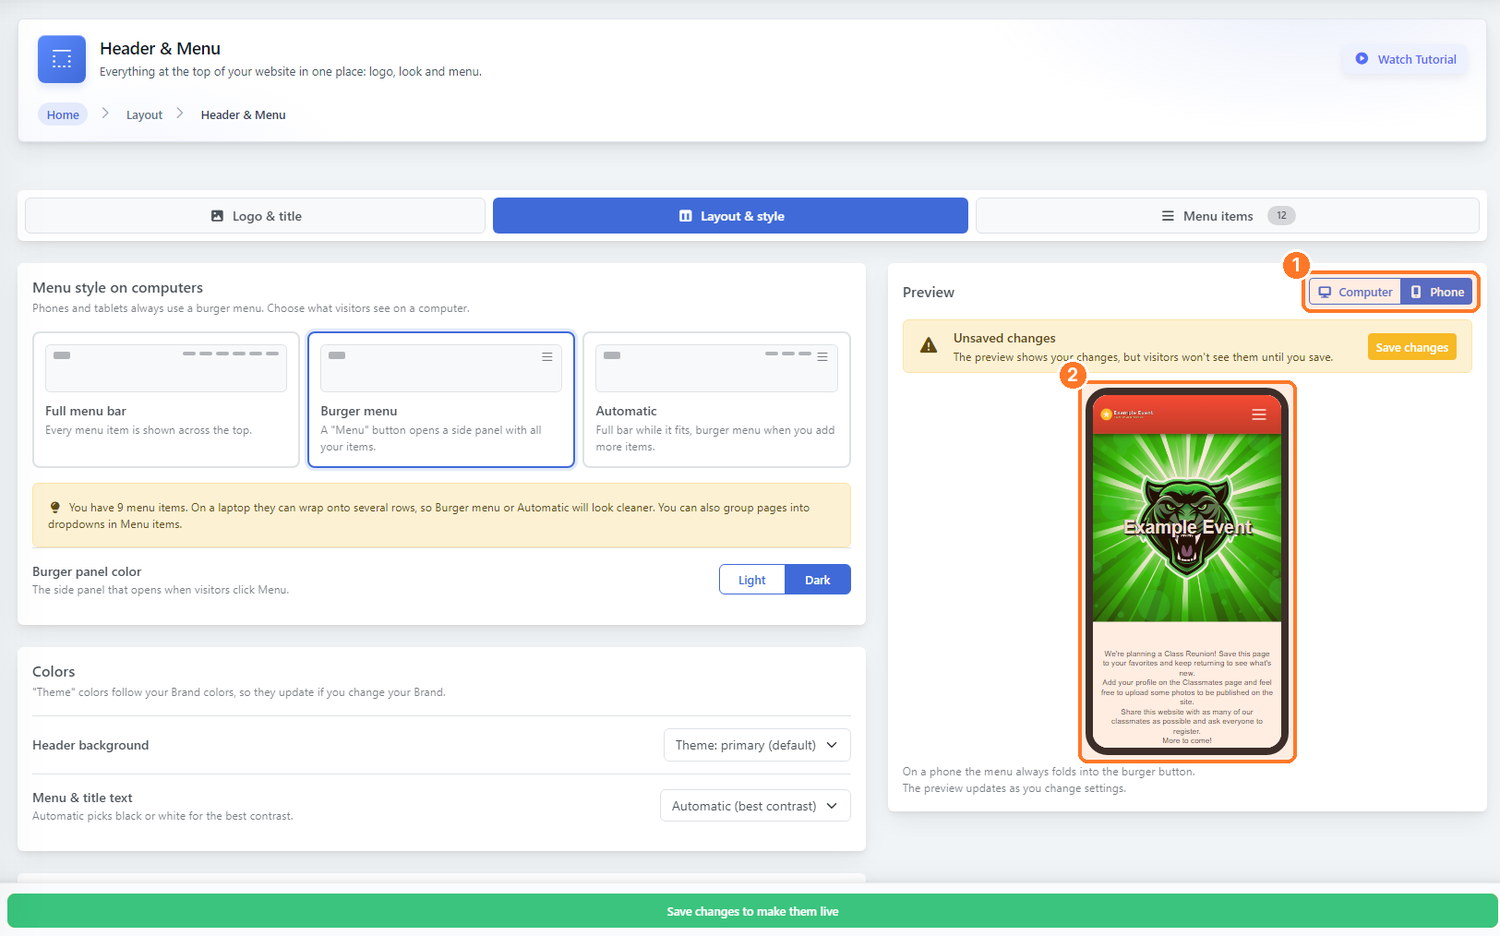
The page has three tabs: Logo & title, Layout & style and Menu items. The Preview on the right shows your header as you work. Use Computer and Phone above it to switch views.
Step 2: Add your logo
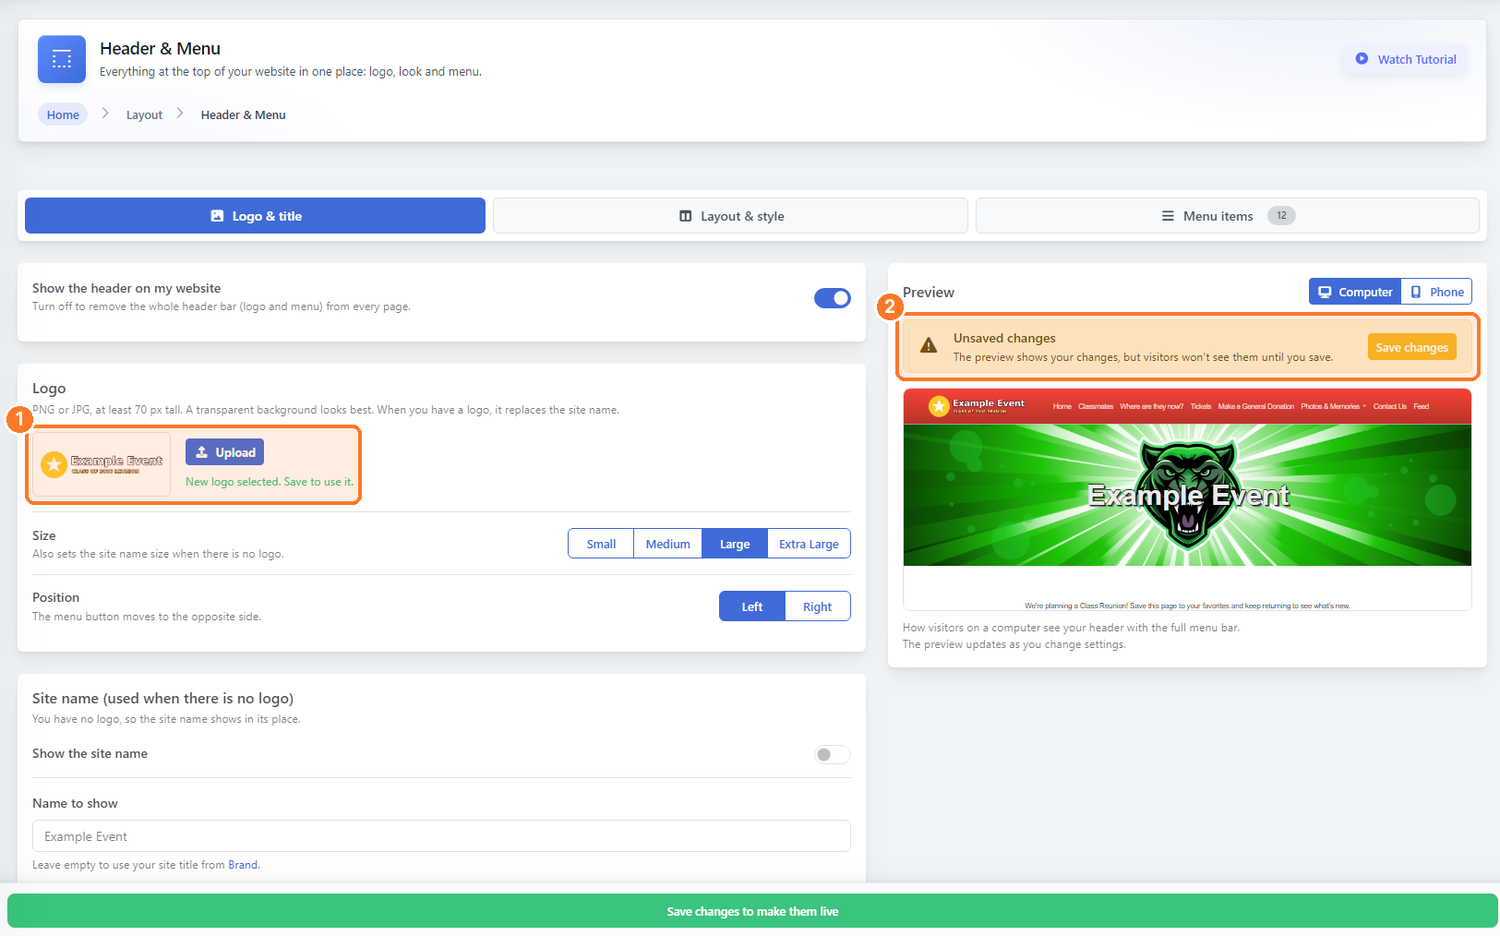
On the Logo & title tab, click Upload and choose your image. A PNG or JPG at least 70 px tall works; a transparent background looks best. You'll see New logo selected. Save to use it.
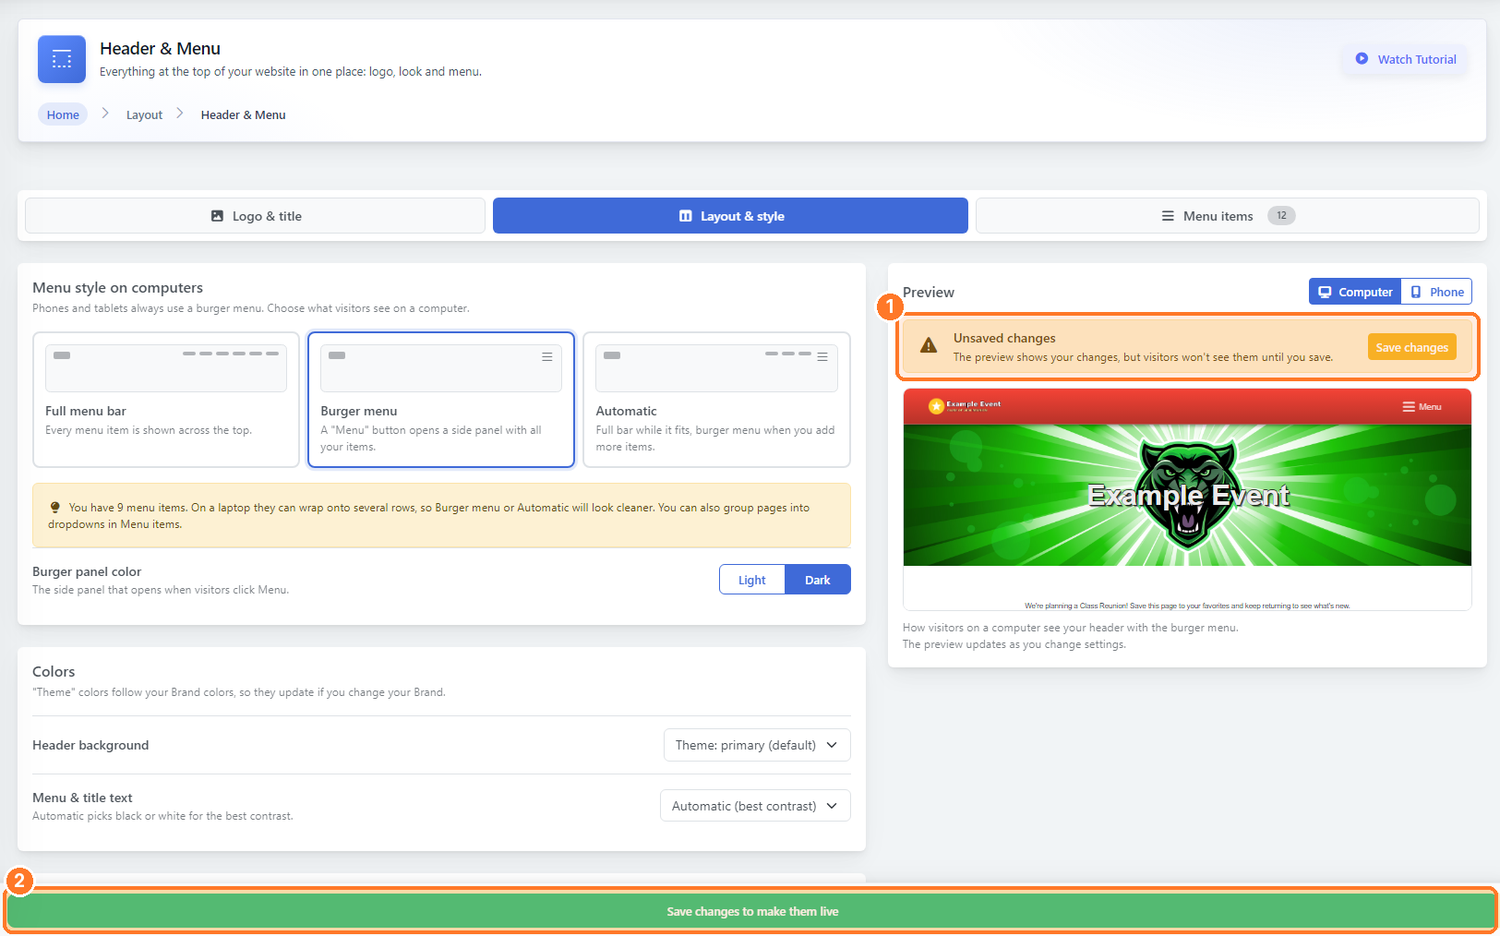
A yellow Unsaved changes note appears above the preview. Your guests won't see your changes until you click Save changes at the bottom of the page.
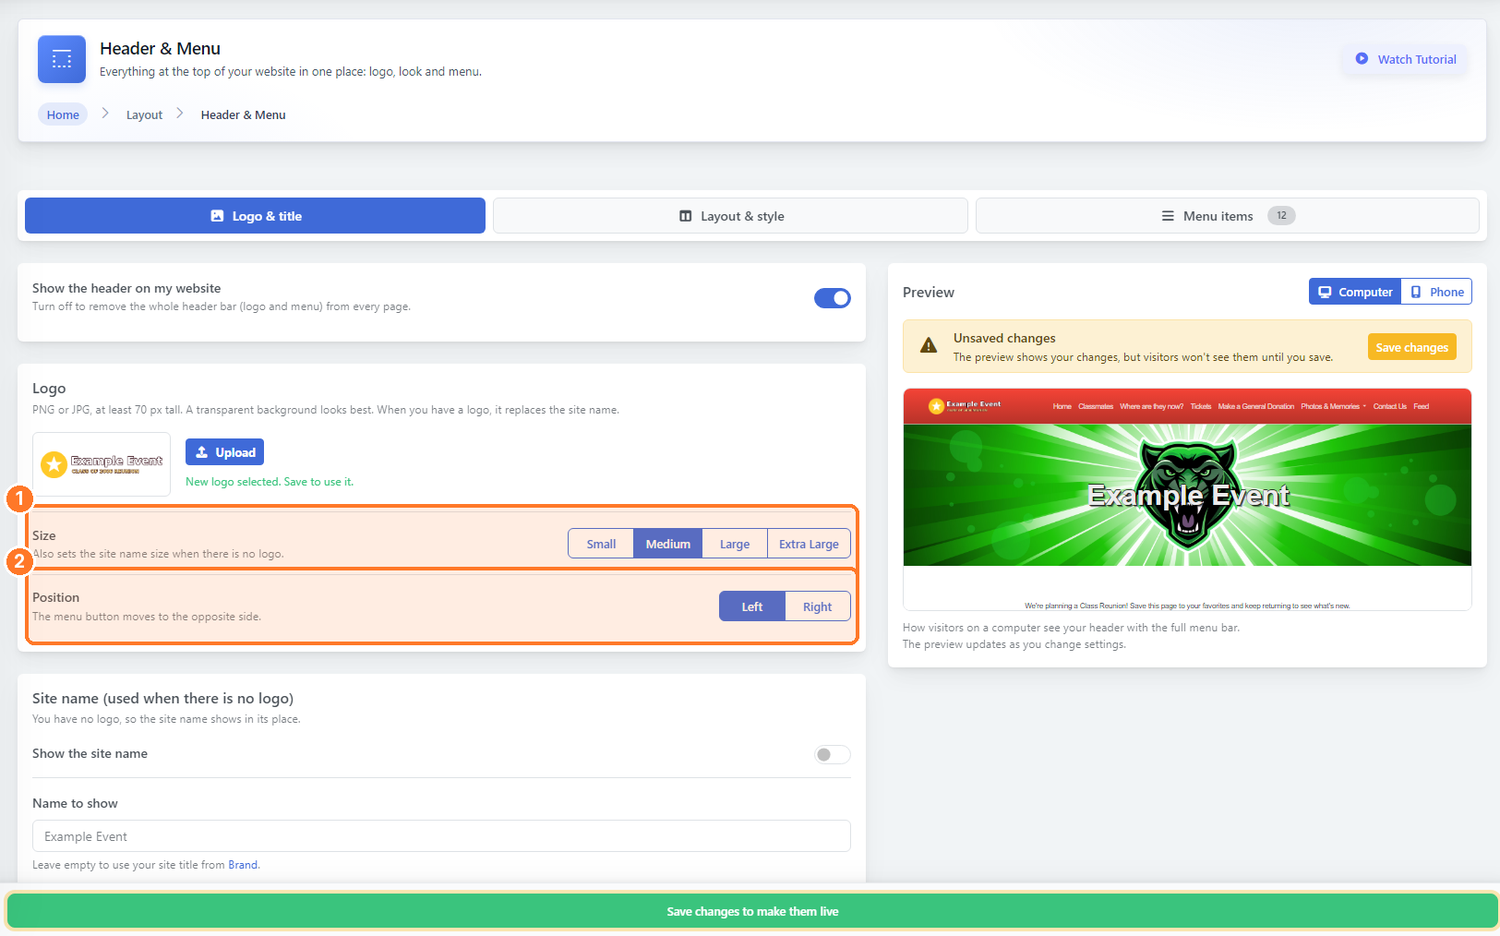
Choose a Size (Small, Medium, Large or Extra Large) and a Position (Left or Right). On phones, the menu button moves to the opposite side.
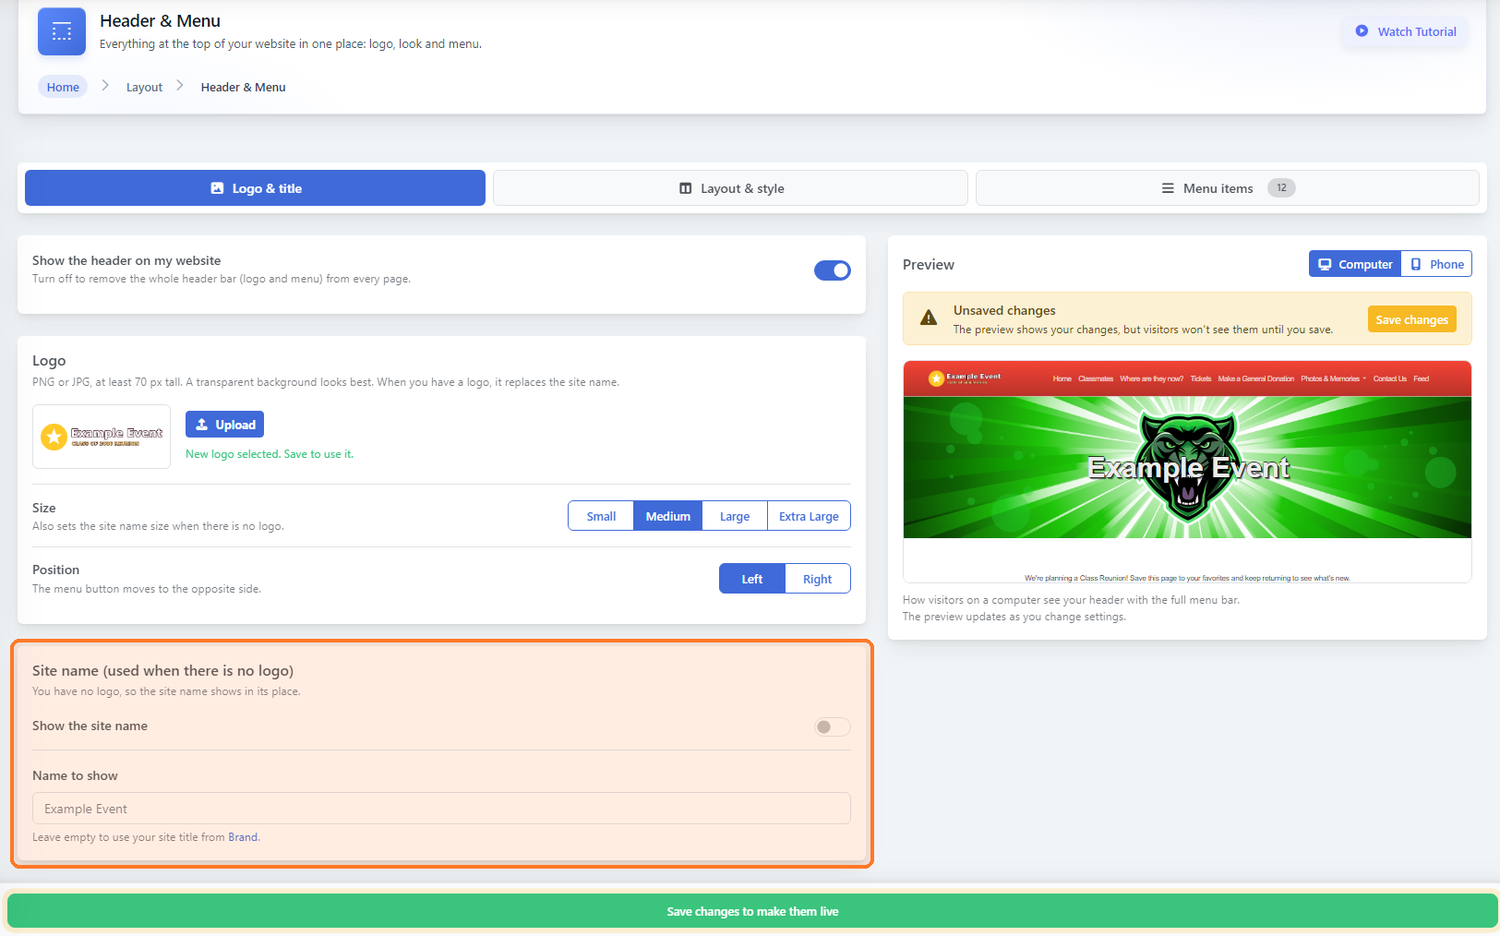
No logo? Under Site name, turn on Show the site name. You can type a different Name to show, or leave it empty to use your site title from Brand.
Step 3: Choose your menu style
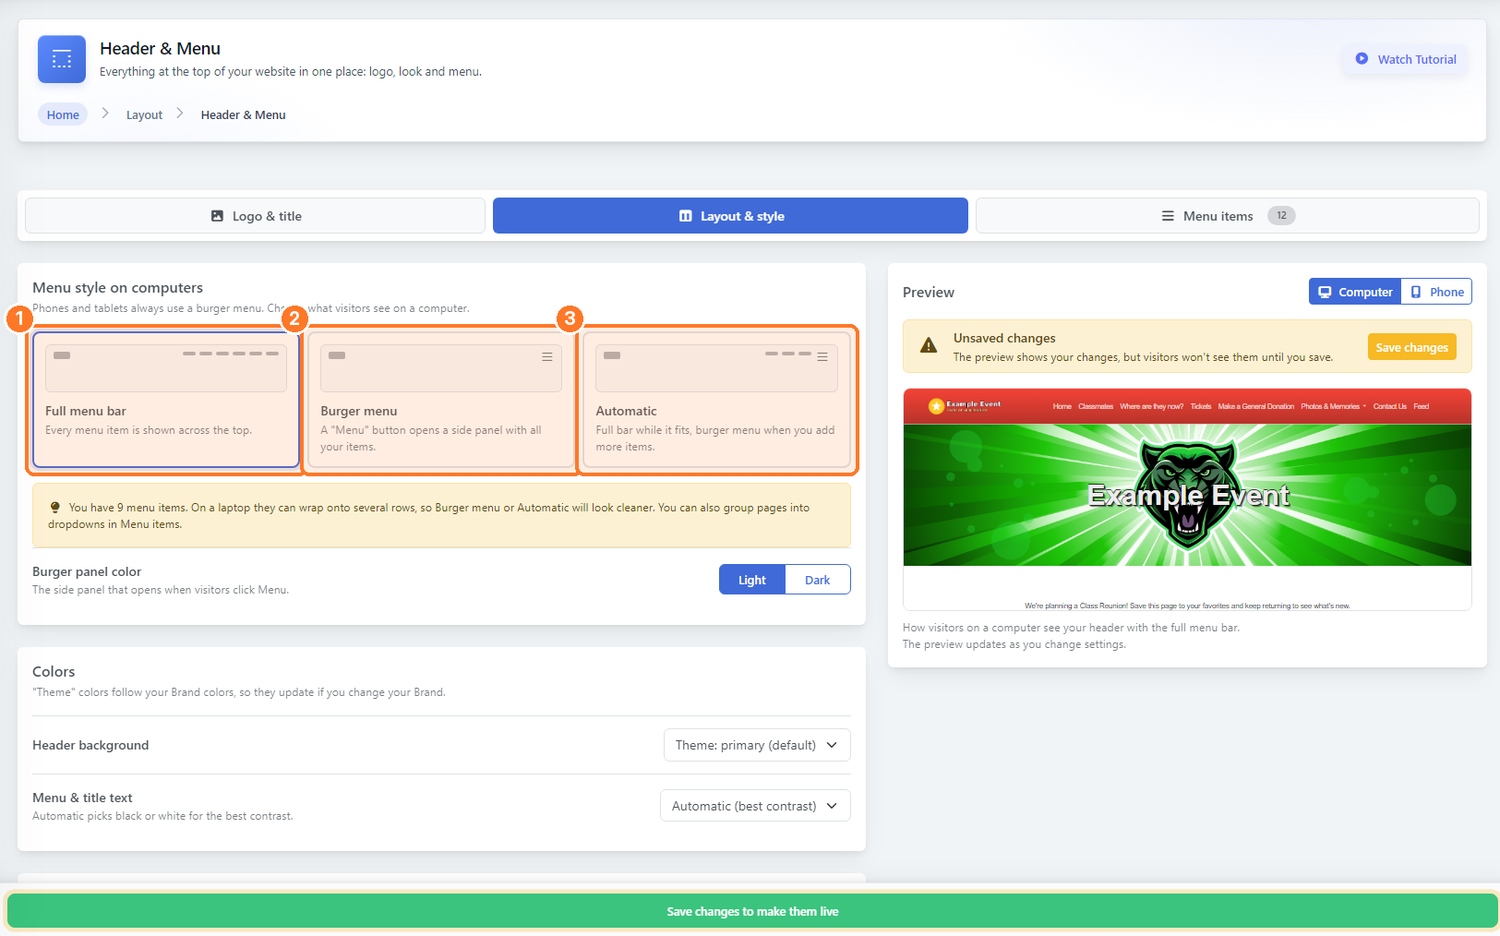
Open the Layout & style tab. Under Menu style on computers, pick one of three styles. Phones and tablets always use a burger menu.
- Full menu bar: every menu item is shown across the top.
- Burger menu: a Menu button opens a side panel with all your items.
- Automatic: the full bar while it fits, and a burger menu once you have more items.
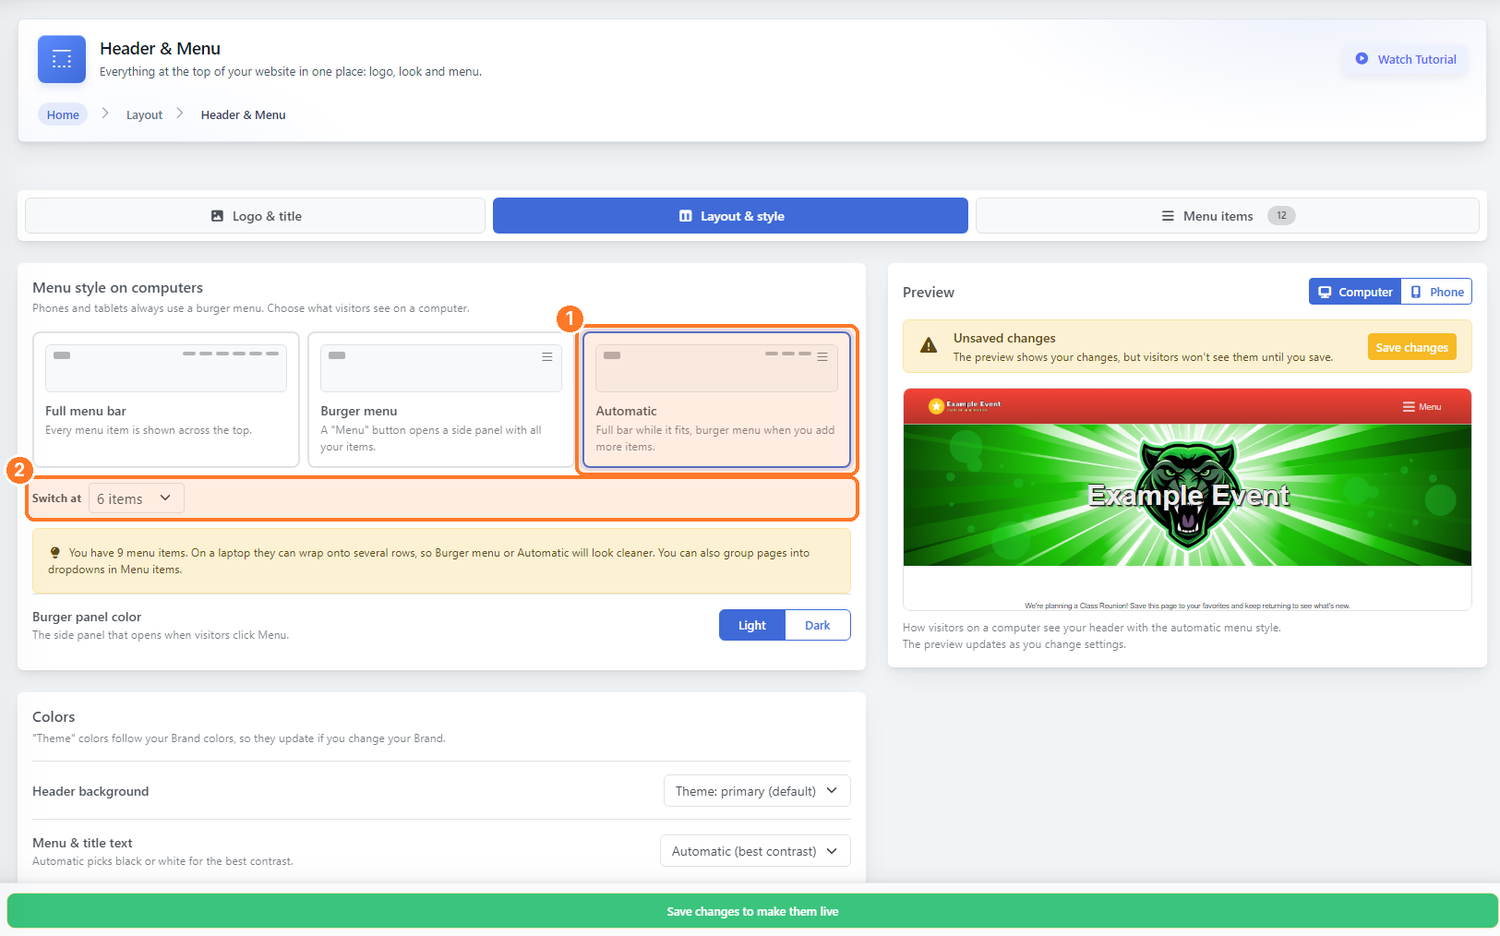
With Automatic, use Switch at to choose how many items (2 to 10) make it switch to the burger menu.
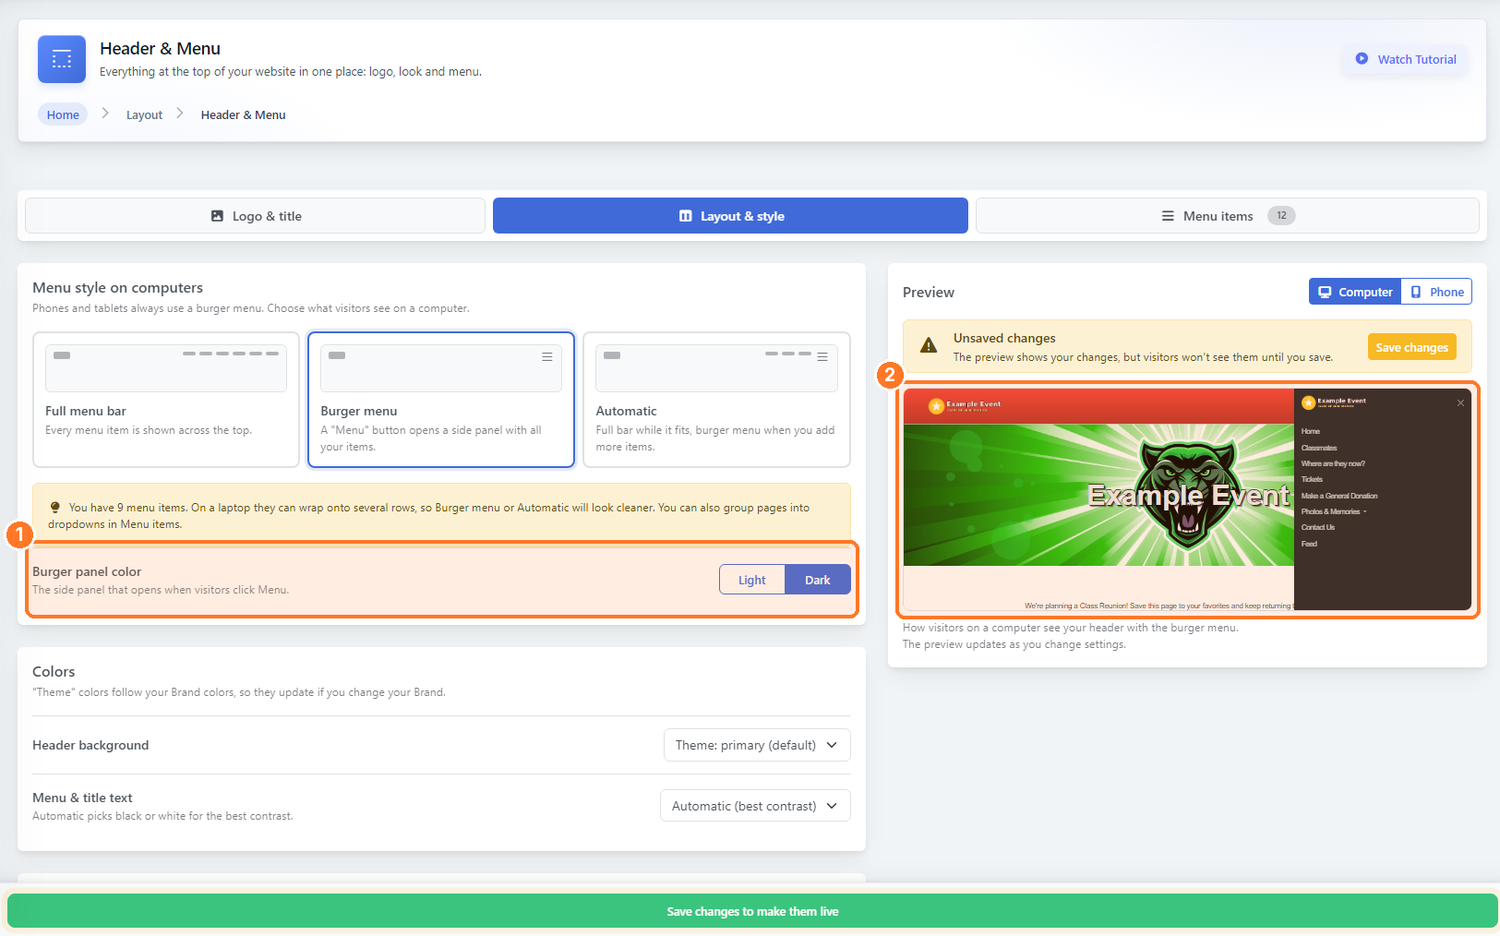
Under Burger panel color, choose Light or Dark for the side panel that opens when visitors click Menu. The preview opens the panel so you can see it.
Step 4: Pick your colors
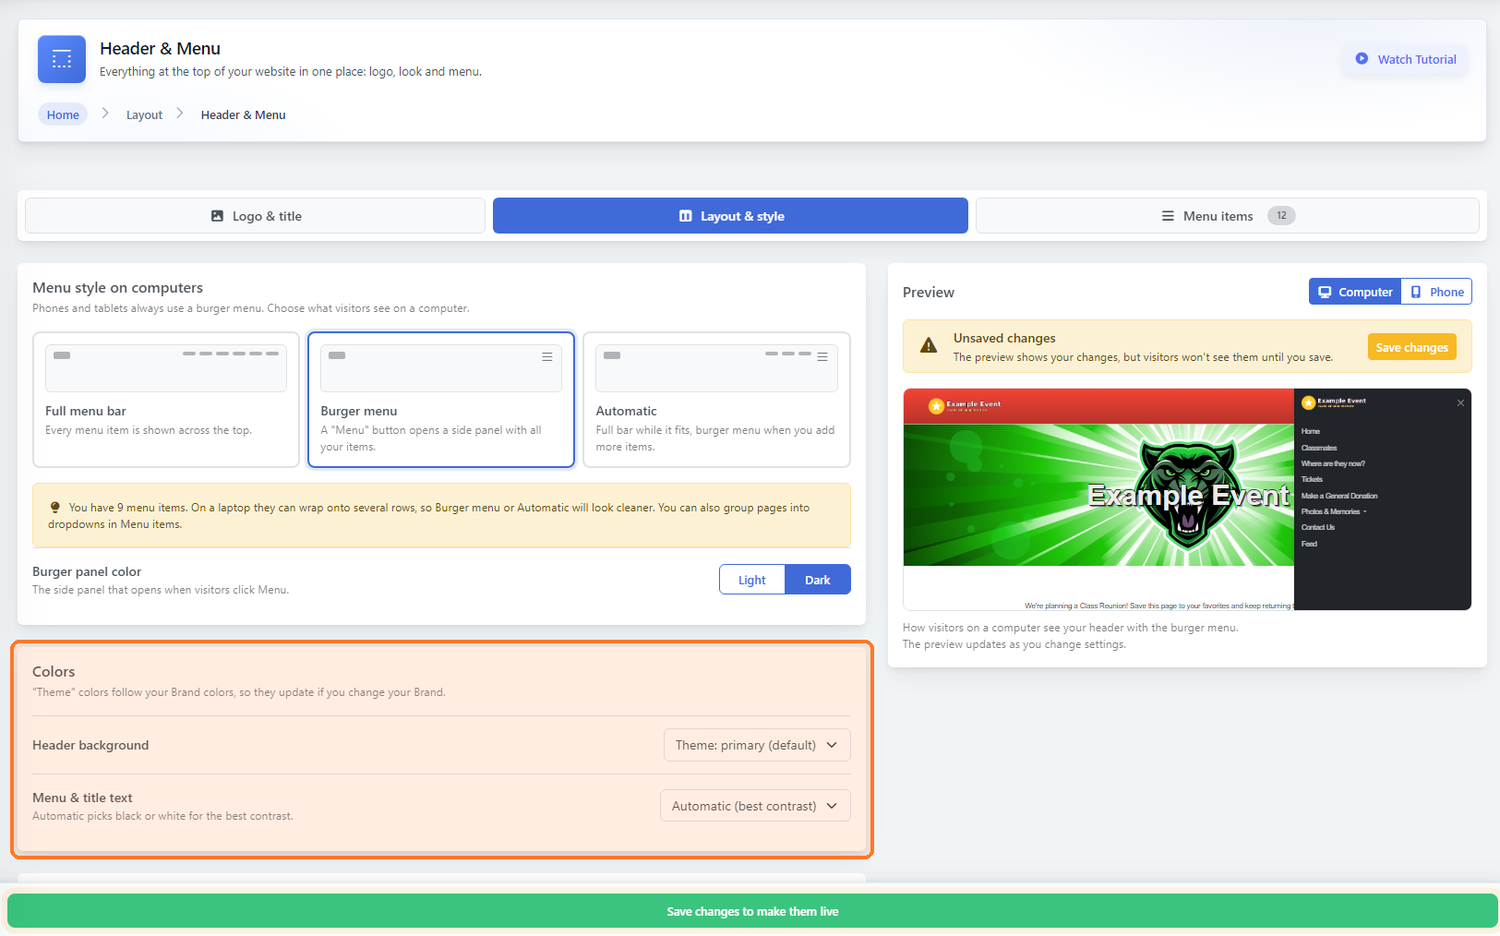
Under Colors, choose a Header background and a Menu & title text color. Theme colors follow your Brand colors, so they update if you change your Brand. Automatic (best contrast) picks black or white text for you.
Step 5: Keep the header visible while scrolling
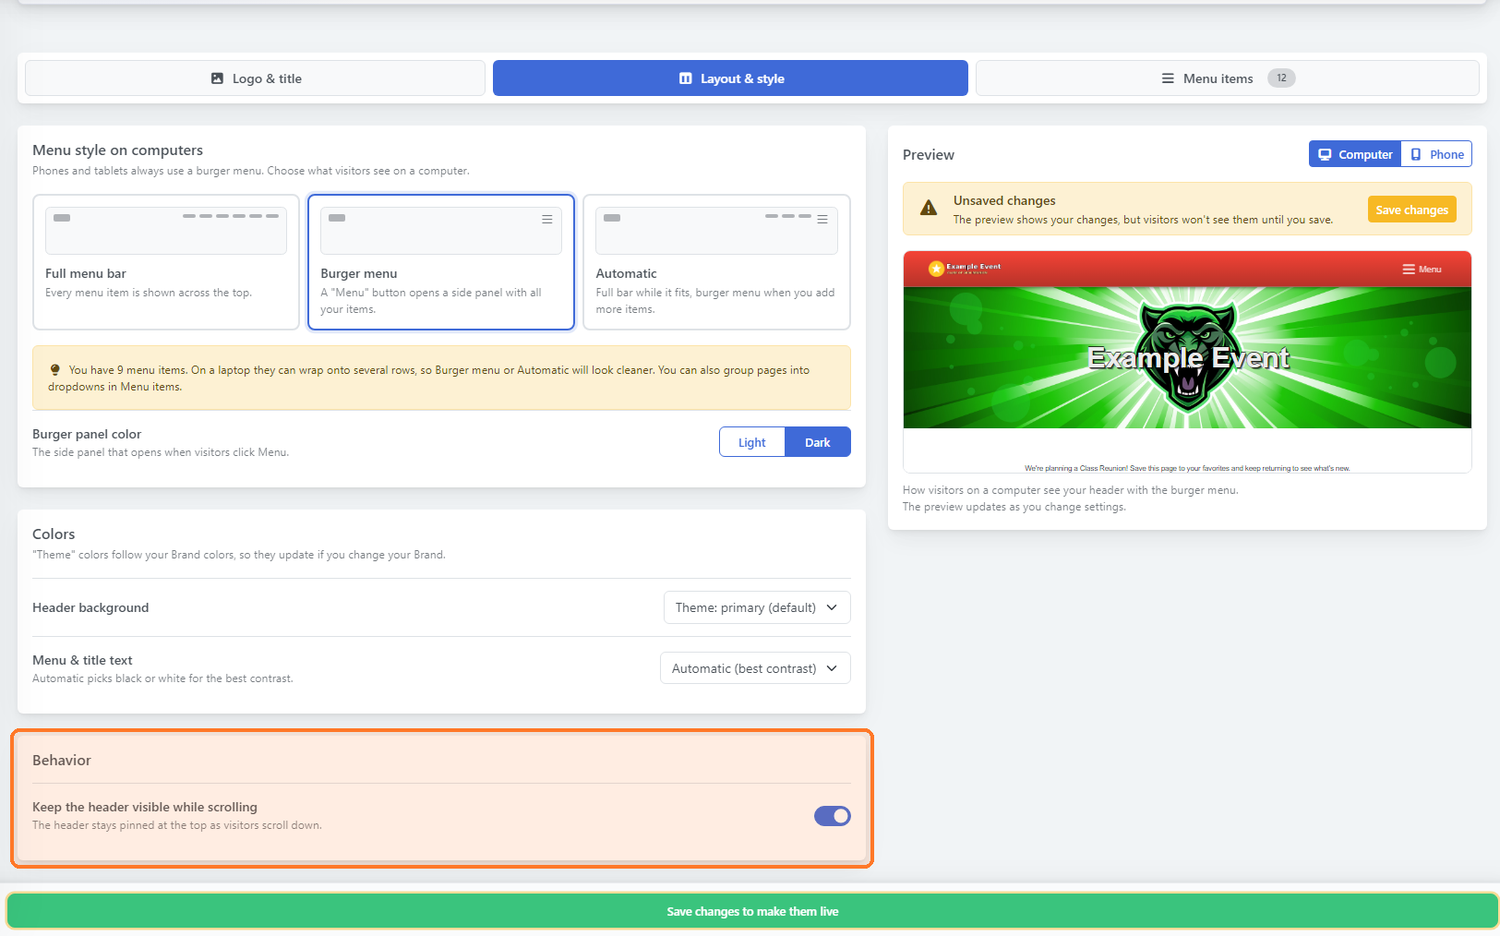
Under Behavior, turn on Keep the header visible while scrolling if you want your menu to stay at the top of the screen as visitors scroll down.
Step 6: Check the phone view and save
Click Phone above the preview to see your header on a small screen, then Computer to switch back.
When you're happy, click Save changes to make them live at the bottom of the page. Your logo, style and colors now show on your event website.
Step 7: Organize your menu items
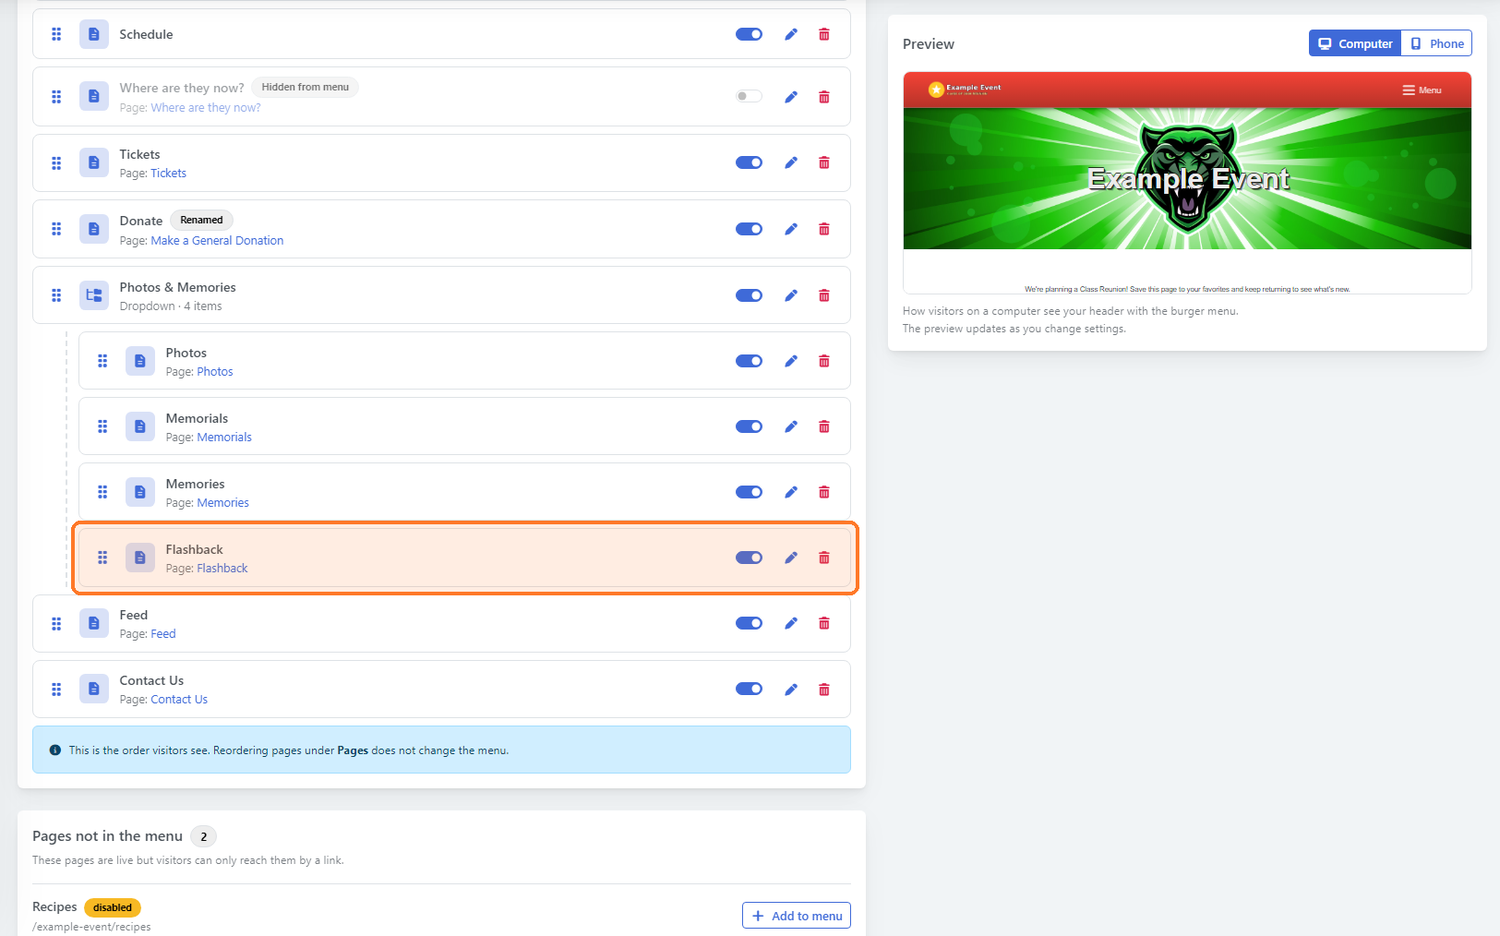
Open the Menu items tab. This list is the exact order your guests see in your menu. Reordering pages under Pages does not change your menu. Changes on this tab save right away, so there is no Save button to click.
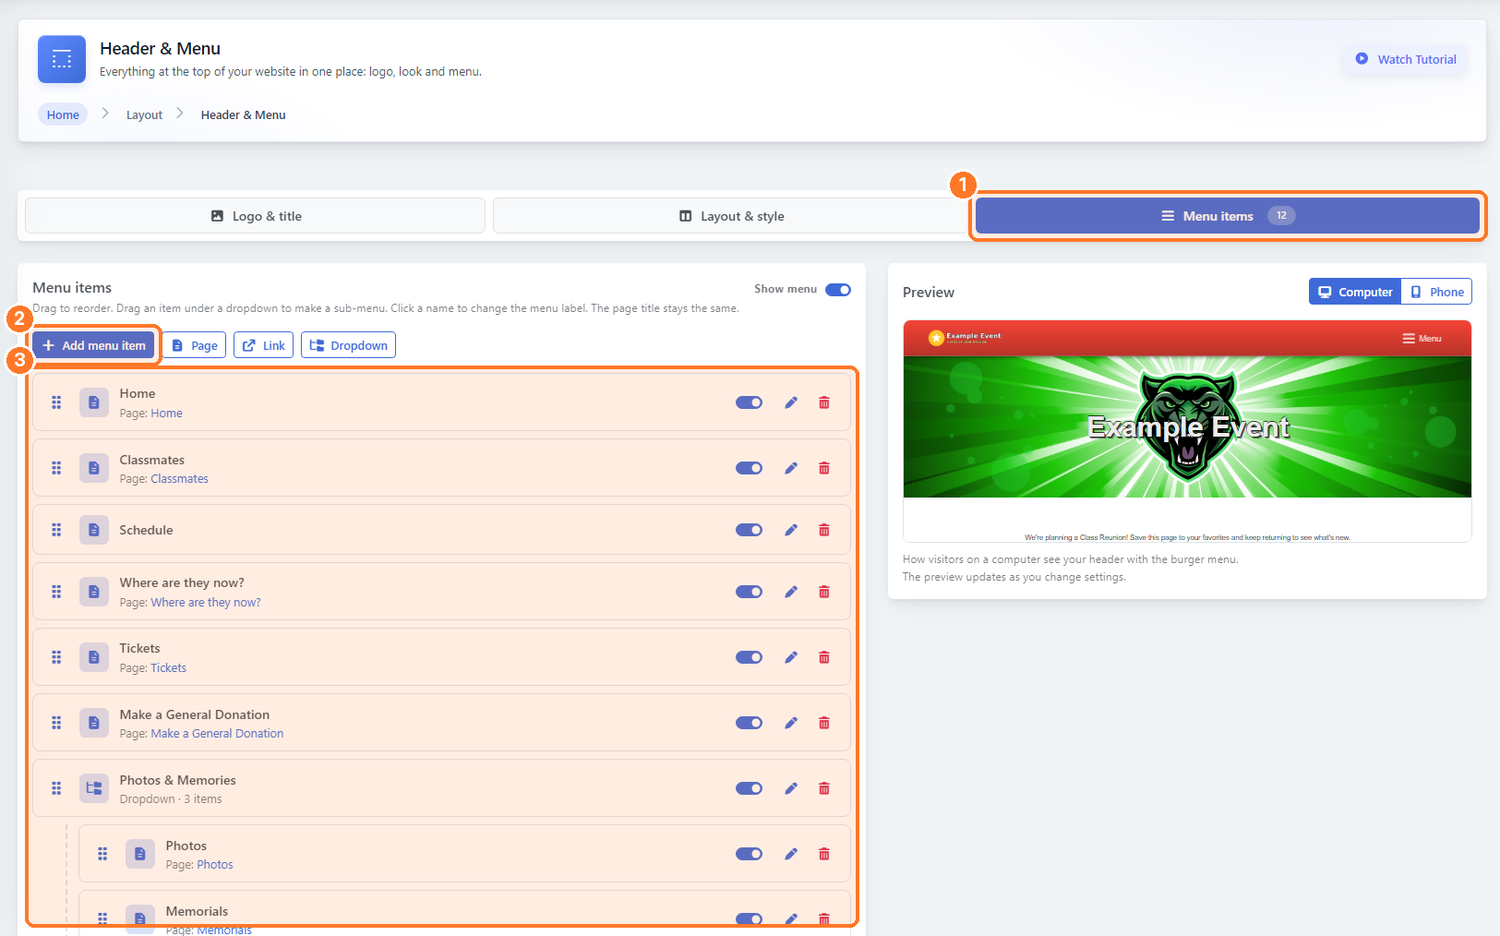
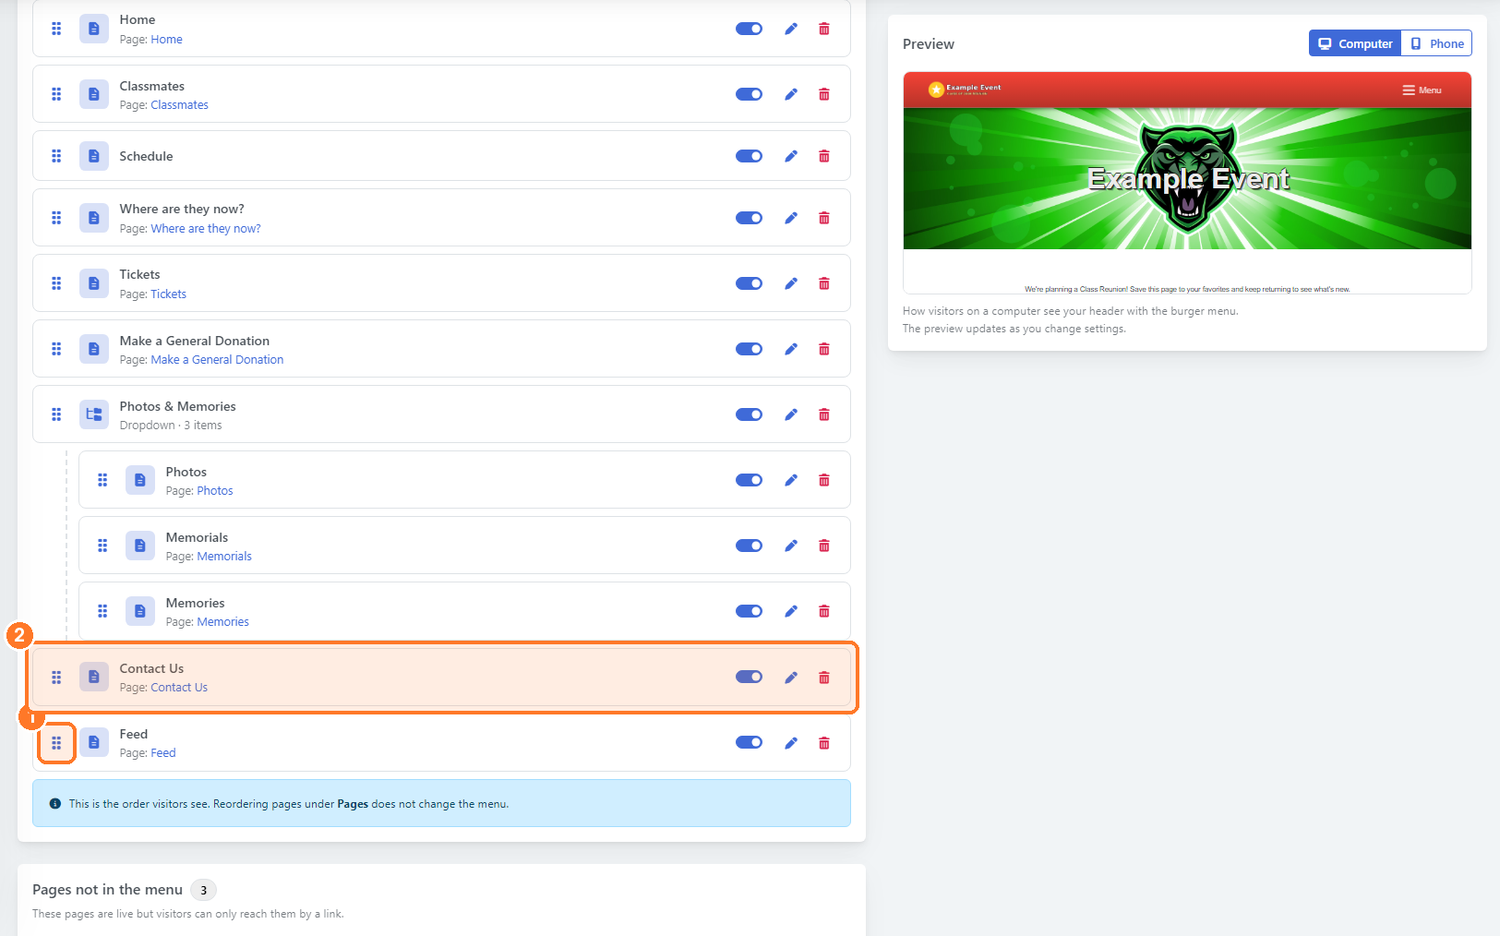
- Reorder: drag an item by its handle (the six dots on the left) to a new spot.
- Dropdowns: items can sit inside a dropdown, like Photos & Memories. Drag an item under a dropdown to put it inside.
- Show menu: the switch at the top right turns the whole menu on or off.
- Disabled pages: if a page in your menu is disabled, its row says Page disabled with an Enable page link. Guests can't see it until you enable it.
Step 8: Change a menu label
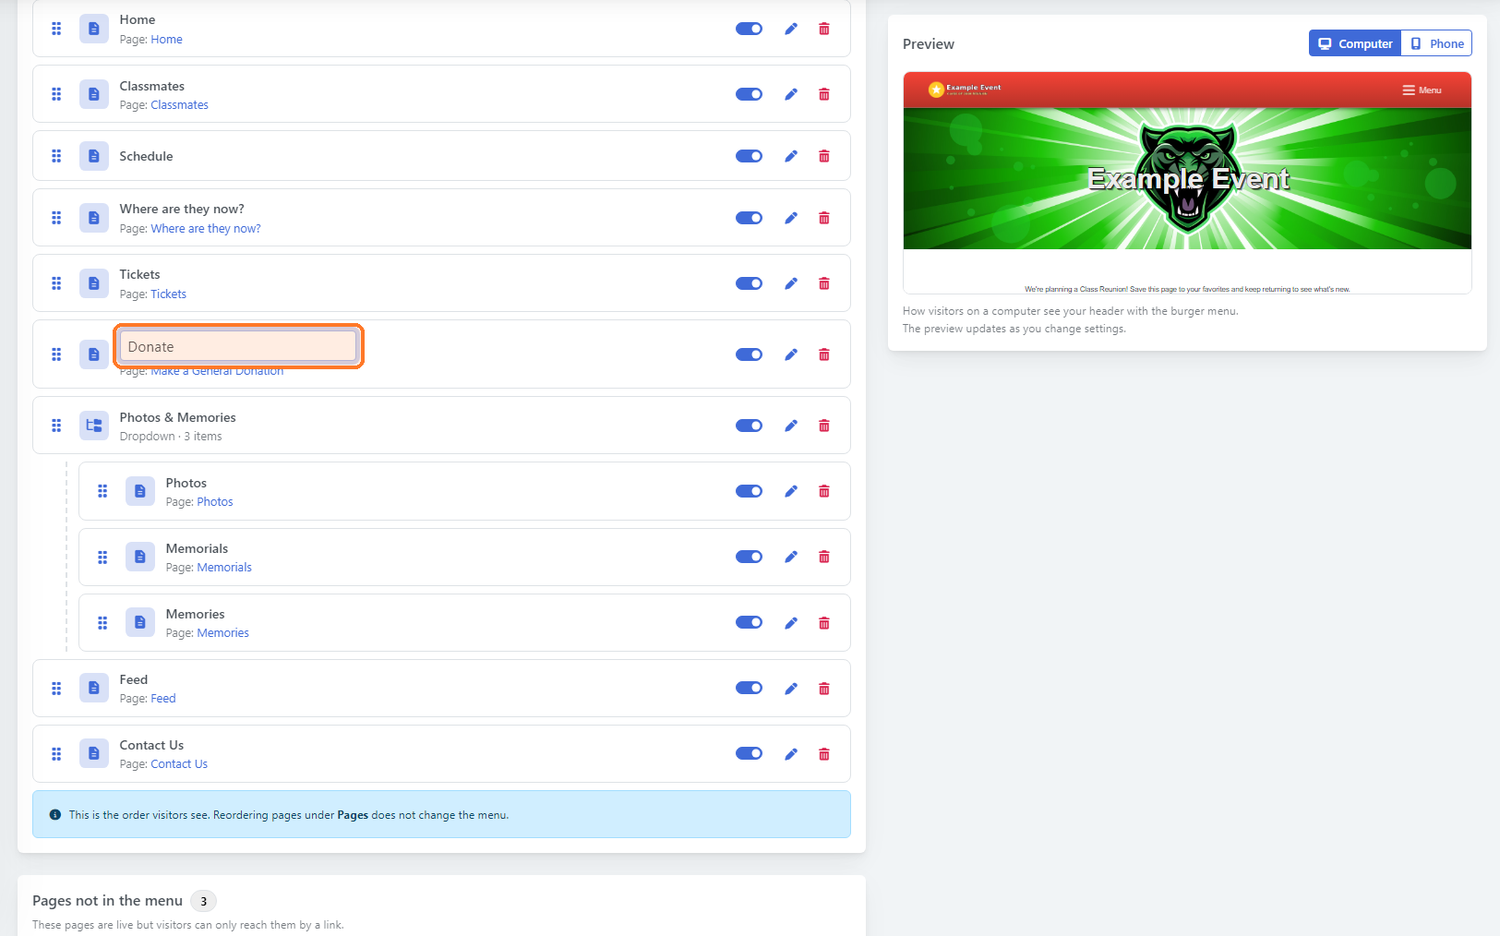
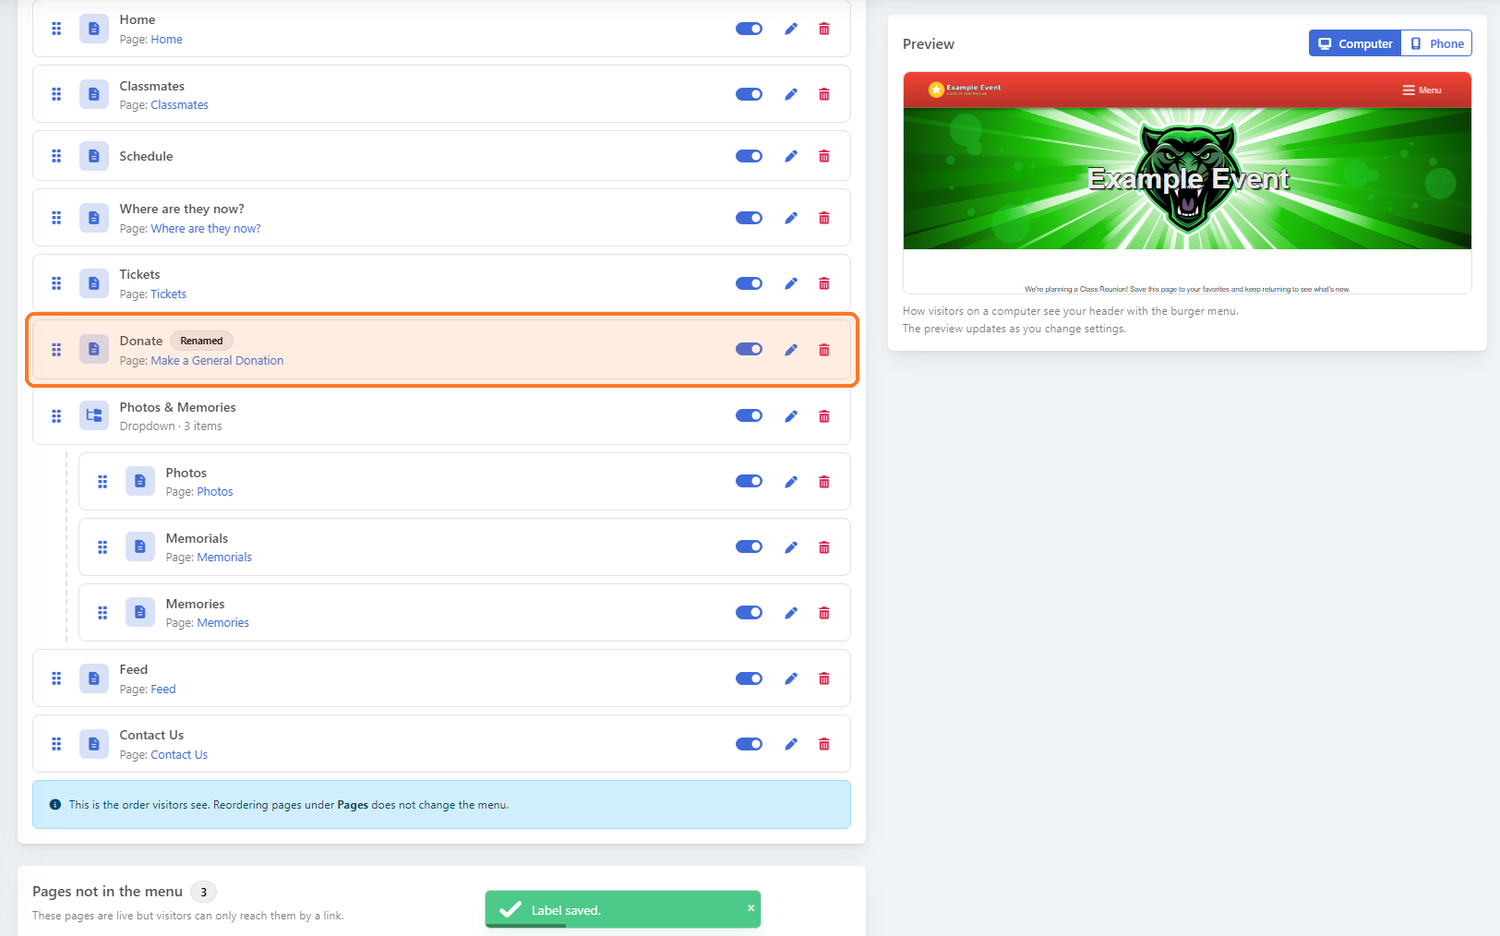
Click an item's name, type a shorter label, and press Enter. Only the menu label changes. The page keeps its full title and its web address, so you don't need to rename the page.
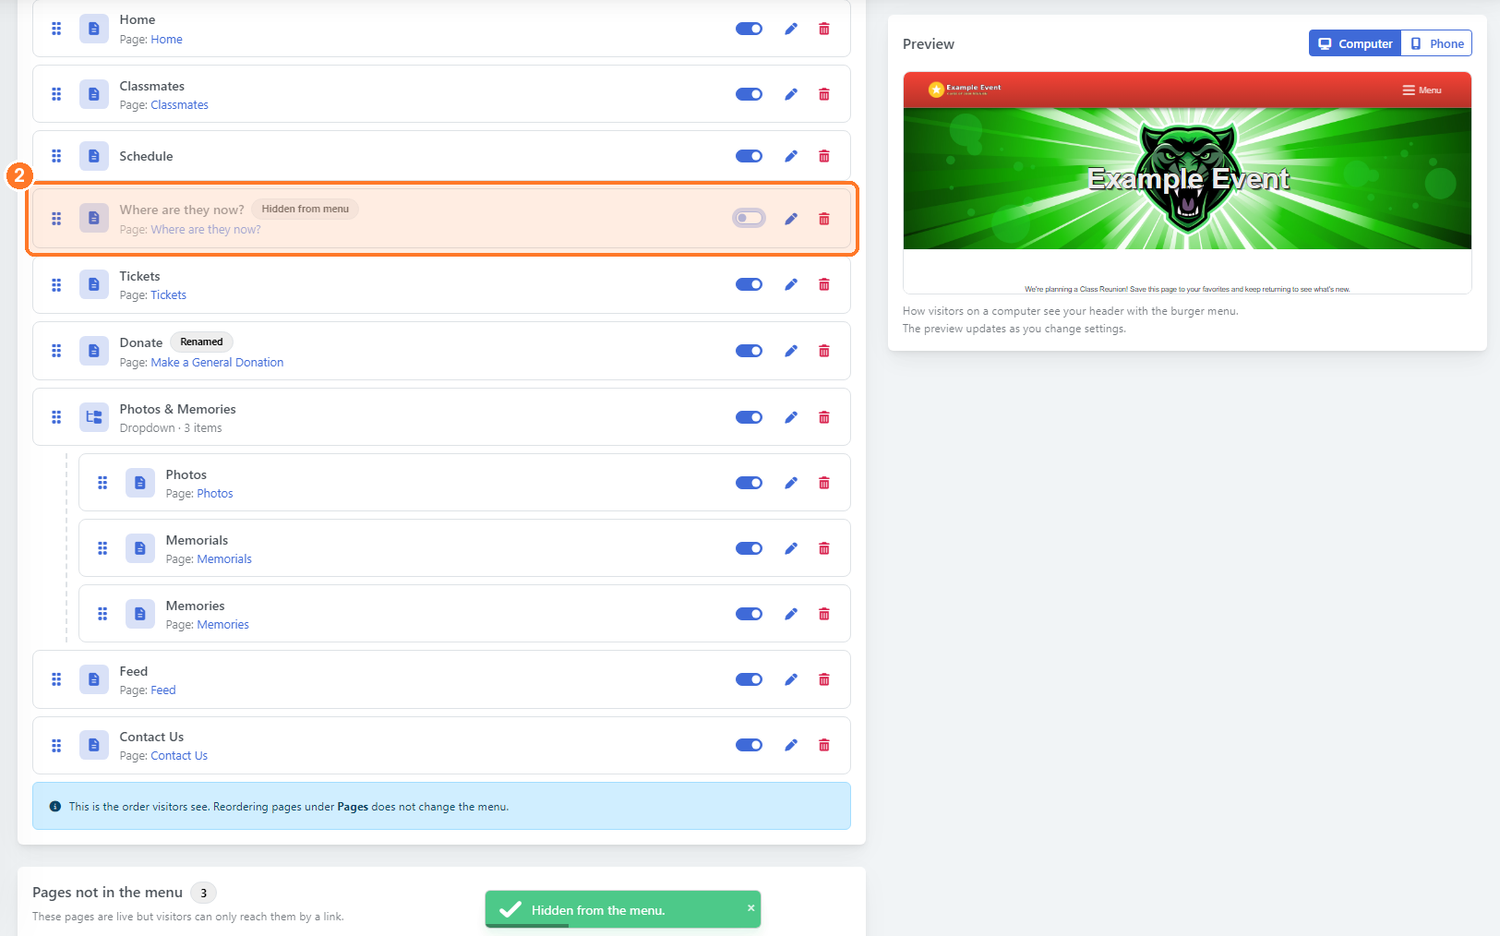
A Renamed badge shows the label is different from the page title, and the line below still shows the page name.
Step 9: Hide an item without deleting it
Turn off the switch on the right of an item. It stays in your list, marked Hidden from menu, and you can turn it back on at any time.
Step 10: Add to your menu
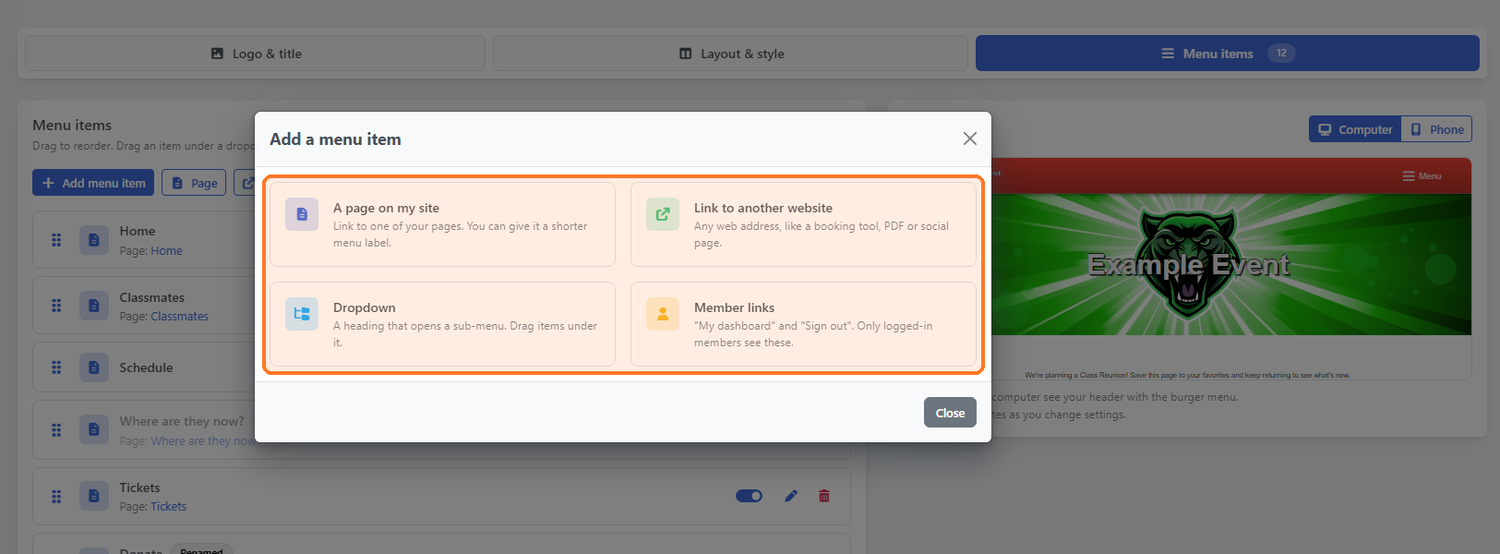
Click Add menu item (or the quick Page, Link and Dropdown buttons) and choose what to add: A page on my site, Link to another website, Dropdown, or Member links.
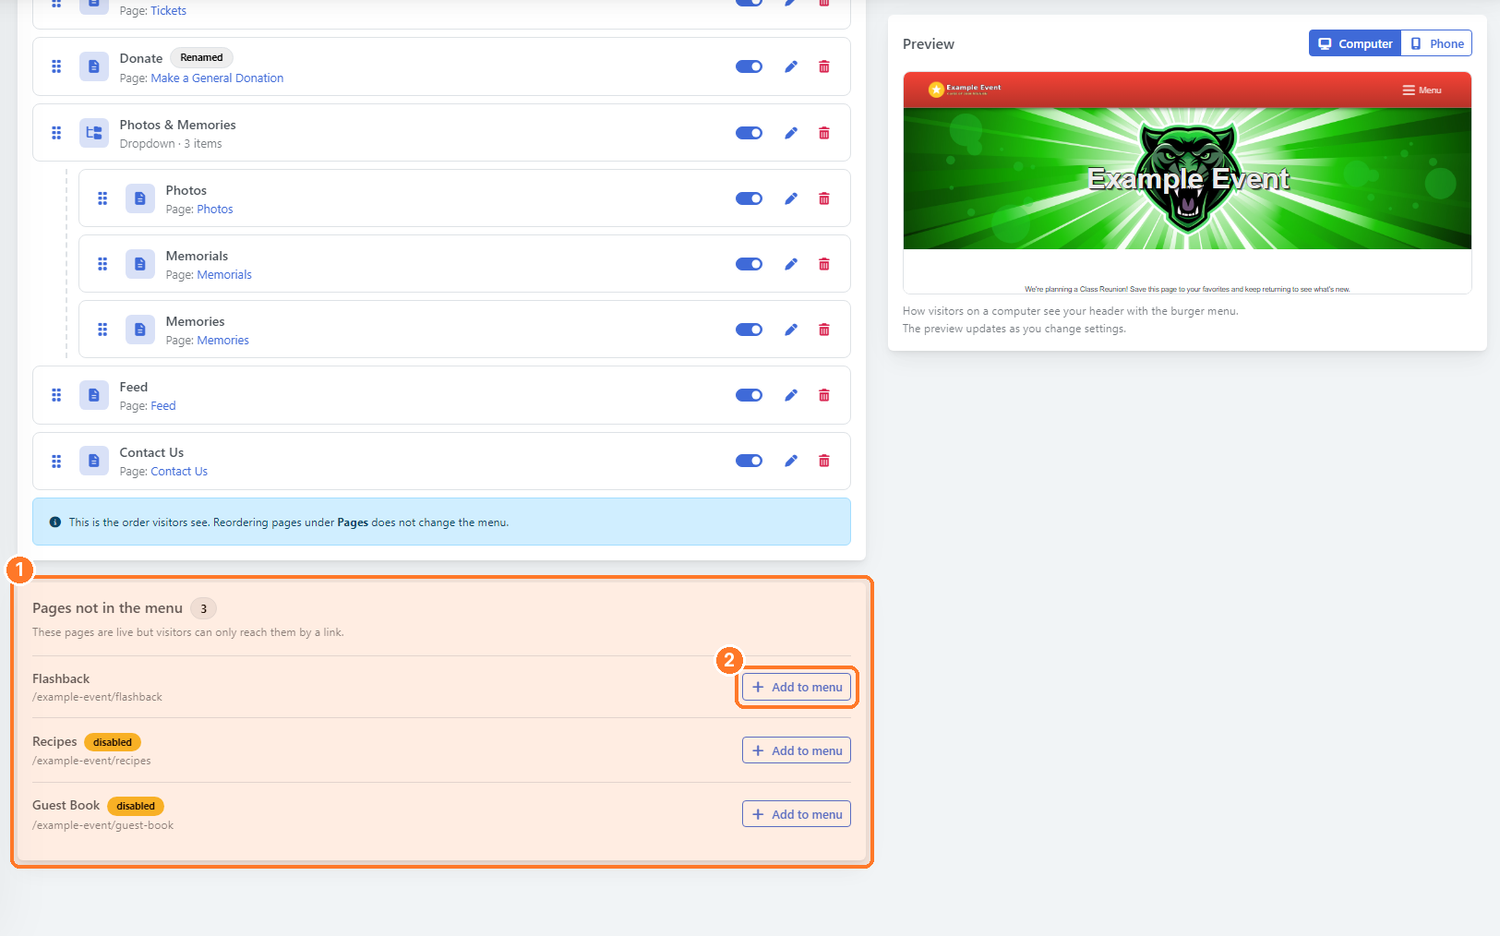
Below the list, Pages not in the menu shows the live pages visitors can only reach by a link. Click Add to menu next to the page you want.
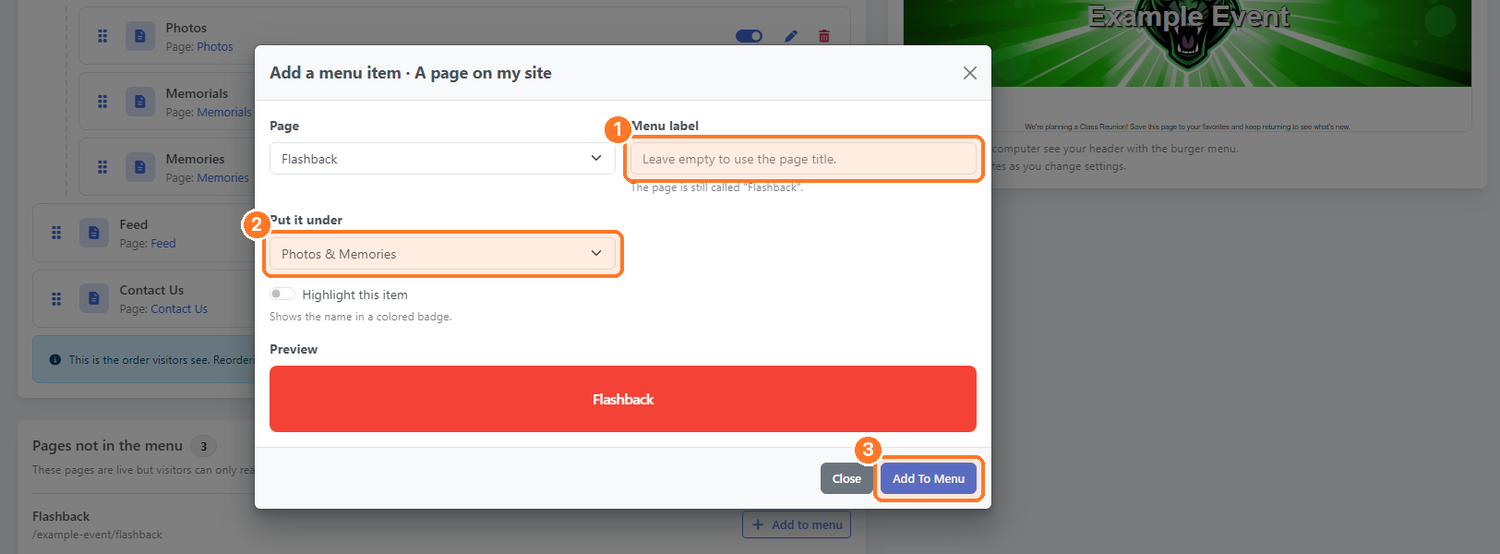
Give it a shorter Menu label if you like (leave it empty to use the page title), choose where it goes under Put it under, then click Add to menu.
Good to know
- Changes on Logo & title and Layout & style are previewed first and go live when you click Save changes.
- Changes on Menu items (order, labels, show or hide, new items) save right away.
- Renaming a menu item never changes the page's title or web address.
- The Add to the header menu and Add to the footer menu switches in a page's settings (Pages, then the gear icon) add or remove that page here too.
- When you save a page's settings under Pages, its menu label is reset to the page title. If you gave it a shorter label, set it again on the Menu items tab.